Ingredients
- 185g unsalted butter
- 200g best dark chocolate
- 85g plain flour
- 40g cocoa powder
- 50g milk chocolate
- 3 large eggs
- 275g golden caster sugar
2-While you wait for the chocolate to cool, position a shelf in the middle of your oven and turn the oven on to fan 160C/conventional 180C/gas 4 (most ovens take 10-15 minutes to heat up). Using a shallow 20cm square tin, cut out a square of non-stick baking parchment to line the base. Now tip 85g plain flour and 40g cocoa powder into a sieve held over a medium bowl, and tap and shake the sieve so they run through together and you get rid of any lumps.
3-With a large sharp knife, chop 50g white chocolate and 50g milk chocolate into chunks on a board. The slabs of chocolate will be quite hard, so the safest way to do this is to hold the knife over the chocolate and press the tip down on the board, then bring the rest of the blade down across the chocolate. Keep on doing this, moving the knife across the chocolate to chop it into pieces, then turn the board round 90 degrees and again work across the chocolate so you end up with rough squares.
4-Break 3 large eggs into a large bowl and tip in 275g golden caster sugar. With an electric mixer on maximum speed, whisk the eggs and sugar until they look thick and creamy, like a milk shake. This can take 3-8 minutes, depending on how powerful your mixer is, so don't lose heart. You'll know it's ready when the mixture becomes really pale and about double its original volume. Another check is to turn off the mixer, lift out the beaters and wiggle them from side to side. If the mixture that runs off the beaters leaves a trail on the surface of the mixture in the bowl for a second or two, you're there.
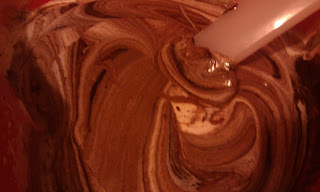
5- Pour the cooled chocolate mixture over the eggy mousse, then gently fold together with a rubber spatula. Plunge the spatula in at one side, take it underneath and bring it up the opposite side and in again at the middle. Continue going under and over in a figure of eight, moving the bowl round after each folding so you can get at it from all sides, until the two mixtures are one and the colour is a mottled dark brown. The idea is to marry them without knocking out the air, so be as gentle and slow as you like - you don't want to undo all the work you did in step 4.
 |
| I added come cherries for added flavour! |
6-Hold the sieve over the bowl of eggy chocolate mixture and resift the cocoa and flour mixture, shaking the sieve from side to side, to cover the top evenly. Gently fold in this powder using the same figure of eight action as before. The mixture will look dry and dusty at first, and a bit unpromising, but if you keep going very gently and patiently, it will end up looking gungy and fudgy. Stop just before you feel you should, as you don't want to overdo this mixing. Finally, stir in the milk chocolate chunks until they're dotted throughout. Now your mixing is done and the oven can take over.
7-Pour the mixture into the prepared tin, scraping every bit out of the bowl with the spatula. Gently ease the mixture into the corners of the tin and paddle the spatula from side to side across the top to level it. Put in the oven and set your timer for 25 minutes. When the buzzer goes, open the oven, pull the shelf out a bit and gently shake the tin. If the brownie wobbles in the middle, it's not quite done, so slide it back in and bake for another 5 minutes until the top has a shiny, papery crust and the sides are just beginning to come away from the tin. Take out of the oven.
8- Leave the whole thing in the tin until completely cold, then, if you're using the brownie tin, lift up the protruding rim slightly and slide the uncut brownie out on its base. If you're using a normal tin, lift out the brownie with the foil. Cut into quarters, then cut each quarter into four squares and finally into triangles. These brownies are so addictive you'll want to make a second batch before the first is finished, but if you want to make some to hide away for a special occasion, it's useful to know that they'll keep in an airtight container for a good two weeks and in the freezer for up to a month.
the end result was amazing and whereas I took a few squares over the next few days, my hubby ate his in two days flat, huge slab-like portions they were too! Very chocolatety and rich - these are worth a go!
Recipe taken and adapted for my own use-from here
hope you like!
Birdie Love
xxx


No comments:
Post a Comment
Thank you for reading my blog! Please feel free to leave a comment, I love to hear from you! Comments that are deemed rude/nasty will be taken down so play nice! XOXO